It's done, I've launched my weblog or more a brain archives.
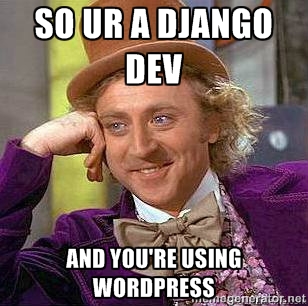
Because I don't want to use Wordpress and I'm a Django developer, my first choice has been Zinnia: a weblog CMS powered by Django. So the first post will be simply about it.
So what's Zinnia
Django Blog Zinnia is a Django application for manage weblogs, its author, Fantomas42, describes it as following:
Simple yet powerful and really extendable application for managing a blog within your Django Web site.
Zinnia has been made for publishing Weblog entries and designed to do it well.
Basically any feature that can be provided by another reusable app has been left out. Why should we re-implement something that is already done and reviewed by others and tested?
Make a fresh install
Zinnia is designed like a reusable app, so you must configure in an existing project. Let's create a new one:
pip install django-blog-zinnia
pip install Pillow
django-admin.py startproject myblog
Now set your project settings with following things:
SITE_ID = 1 # or whatever

TEMPLATE_CONTEXT_PROCESSORS = (
    'django.contrib.auth.context_processors.auth',
    'django.core.context_processors.i18n',
    'django.core.context_processors.request',
    'django.contrib.messages.context_processors.messages',
    'zinnia.context_processors.version',
)

INSTALLED_APPS = (
    'django.contrib.auth',
    'django.contrib.sitemaps',
    'django.contrib.contenttypes',
    'django.contrib.sessions',
    'django.contrib.messages',
    'django.contrib.sites', # Do not forget sites
    'django.contrib.admin', # Neither admin
    'django.contrib.admindocs',
    'django.contrib.staticfiles',
    'django_comments',
    'mptt',
    'tagging',
    'zinnia'
)
And update yours urls file with Zinnia's views:
urlpatterns = patterns(
    ...
    url(r'^blog/', include('zinnia.urls', namespace='zinnia')),
    url(r'^comments/', include('django_comments.urls')),
    ...
)
Now migrate your database for install Zinnia tables:
./manage.py migrate
./manage.py createsuperuser
Quick overview
Now you can launch your server: ./manage.py runserver 0.0.0.0:8080
For those which don't want to touch their keyboard, you can visualize a demo here (credentials: demo/demo), Do not hesitate to look at the admin interface. Zinnia is globaly a public web interface and uses Django Admin Site as CMS.
Ow... It's ugly
I think, like me, you think: "I will never wear a shirt with this style". No problem, as a Django app Zinnia is fully customisable. I personally began by use Zinnia-theme-foundation, which have a quick install.
Instead of install, I use it as base skeleton for my weblog. For make it, I downloaded source and incude into a custom app:
./manage.py startapp myapp
git clone git@github.com:django-blog-zinnia/zinnia-theme-foundation.git /tmp/zinnia-theme-foundation --depth=1
cp -r /tmp/zinnia-theme-foundation/zinnia_foundation/static/ myapp/
cp -r /tmp/zinnia-theme-foundation/zinnia_foundation/templates/ myapp/
Add myapp at beginning of your INSTALLED_APPS for use it as first template and static loader.
./manage.py runserver 0.0.0.0:8080 # againAh yeah, now we've got a good shirt !
I should maybe git it
Because all this blog uses opensource tools, I decided to share it on Github: Here. Download it with: git clone git@github.com:ZuluPro/myblog.git
I'll try to make this blog 100% OpenSource, with all aspect detailled: Application, architecture, system configuration, etc ...
UPDATE:
I change theme again.
Comments